
How Do You Install Drip Irrigation in a Xeriscape?
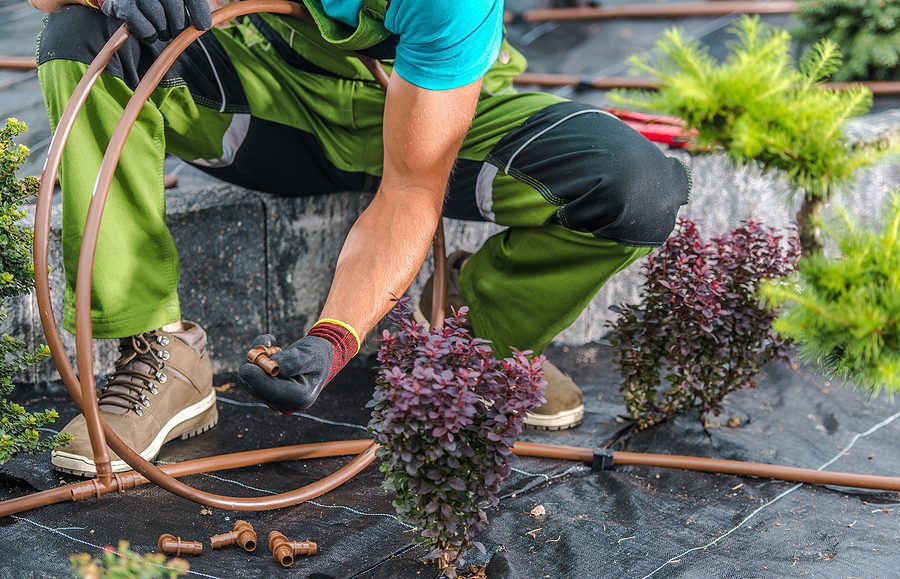
Installing drip irrigation in a xeriscape starts with understanding where each plant needs water, how the soil absorbs moisture, and whether the available water pressure can support the proposed system. The installation then involves connecting the proper water-supply components, laying distribution tubing, positioning emitters near plant root zones, and testing everything before covering the lines with mulch.
For Albuquerque homeowners, the details matter. A drip system that works well in sandy soil may need adjustments in compacted clay or caliche. A sunny planting bed next to a west-facing wall may also have different watering needs than shrubs growing in a shaded courtyard.
Drip irrigation can make xeriscaping more efficient because it delivers water to selected planting areas instead of spraying an entire yard. However, a poorly designed system can still waste water, create runoff, or leave plants struggling.
The following installation process explains how to plan, assemble, test, and maintain a drip irrigation system suited to Albuquerque’s high-desert conditions.
Plan the Drip Irrigation Layout Before Buying Parts
The most important part of installing drip irrigation happens before any tubing is connected.
Start by drawing a simple map of the planting area. Mark existing trees, shrubs, flowering plants, pathways, walls, slopes, and the proposed water source.
Next, identify plants with similar watering requirements. This practice is called hydrozoning, and it helps prevent plants with different needs from receiving the same watering schedule.
Separate Plants According to Their Water Needs
Not every drought-tolerant plant requires the same amount of water.
A newly planted desert willow may need regular establishment watering while its root system develops. An established Apache plume or other well-adapted shrub may need considerably less supplemental irrigation.
Placing both on one irrigation zone can make watering difficult. The schedule needed to establish a young tree could provide unnecessary water for established shrubs.
Where practical, organize the landscape into separate zones for plants with different watering requirements. Even within a zone, emitter selection and placement must account for individual plants.
Evaluate Soil Conditions and Drainage
Albuquerque properties can contain sandy soil, clay, caliche, or combinations of these materials.
Water generally moves through sandy soil differently than through dense clay. Compacted layers can also slow infiltration, causing water to spread across the surface rather than soak into the intended root zone.
Before installing emitters, test how the soil absorbs water in representative planting areas.
A simple observation after watering can reveal whether moisture spreads outward, penetrates deeply, or begins pooling near the surface. A soil probe or careful digging can help determine how far moisture has traveled.
This information is more useful than assuming every plant needs the same emitter spacing.
Check Slopes, Sun Exposure, and Tubing Distance
A planting bed on a slope may need a different layout from a level yard. Water can move downhill, especially when soil absorbs it slowly.
Long tubing runs can also experience pressure differences that affect emitter performance.
Hot locations beside pavement or west-facing walls may dry faster than shaded planting beds.
These conditions should influence the irrigation design before materials are purchased.
What Parts Does a Xeriscape Drip Irrigation System Need?
A typical residential drip irrigation system uses several components to control water delivery and protect the equipment.
| Component | Purpose | Installation consideration |
| Water source and control valve | Supplies water and controls operation | Confirm available flow, pressure, and connection requirements |
| Backflow protection | Helps prevent irrigation water from contaminating the drinking-water supply | Use protection required for the connection and local rules |
| Filter | Keeps particles from clogging emitters | Match filtration to the emitter manufacturer’s requirements |
| Pressure regulator | Reduces supply pressure to a range suitable for the drip components | Select for the system’s required operating pressure and flow |
| Distribution tubing | Carries water through planting areas | Size and route it to limit pressure loss and physical damage |
| Drip emitters | Release water at selected locations | Match output and placement to plant and soil needs |
| Fittings and flush ends | Connect tubing and allow maintenance | Keep important connections accessible |
The exact arrangement depends on whether the system connects to an outdoor faucet, an existing irrigation valve, or a professionally installed irrigation supply.
A typical flow path is:
Water supply → required backflow protection → control valve → filtration and pressure regulation → distribution tubing → emitters → flushable line ends.
The actual order of the filter, regulator, and other assemblies must follow the approved system design and manufacturer instructions.
Backflow protection is not interchangeable with a pressure regulator. The two components perform different functions, and one cannot replace the other.
Step-by-Step Drip Irrigation Installation
Once the layout and components have been selected, installation can begin.
Step 1: Confirm the Water Supply and Required Protection
Identify where the system will receive water and determine the available pressure and flow.
The supply must support the total demand of the proposed emitters without exceeding the operating limits of the tubing and fittings.
Before connecting irrigation equipment to potable water, confirm applicable cross-connection and backflow-protection requirements with the appropriate local authority.
Connections involving underground supply piping, irrigation valves, or potable-water plumbing may require a qualified professional.
If excavation is planned, contact 811 to arrange underground utility locating before digging.
Step 2: Install the Filter and Pressure Regulator
Drip emitters have small openings that can become blocked by sediment and debris. A properly selected filter helps prevent these particles from entering the system.
A pressure regulator protects low-pressure drip components from excessive supply pressure.
Both components should be compatible with the selected emitters and the expected system flow.
Install the equipment according to manufacturer instructions, paying attention to flow-direction markings and maintenance access.
Avoid placing filters or other serviceable components where they will become buried beneath decorative gravel or difficult to inspect.
Step 3: Lay Out the Main Distribution Tubing
Position the distribution tubing along the planned route before permanently securing it.
This is an opportunity to check whether the tubing reaches each planting area without crossing walkways or creating unnecessary bends.
Avoid sharp kinks that restrict flow. Protect tubing from vehicle traffic, digging, and damage from landscape equipment.
Tubing can often be secured beneath suitable mulch, but installation depth and burial suitability depend on the product and site conditions.
Before covering the tubing, make sure connections remain accessible and the layout allows future maintenance.
Step 4: Install Emitters Near the Plant Root Zones
Emitters release water slowly into the soil.
For individual shrubs and trees, place emitters where water can reach the active root zone rather than concentrating all irrigation directly against the trunk or stem.
As plants grow, emitter placement may need to expand outward to serve a larger root area.
The number of emitters required depends on plant size, soil conditions, emitter output, and the desired wetting pattern.
A young shrub in sandy soil may require a different arrangement from a mature tree growing in compacted soil.
For more detailed guidance, read Choosing the Right Drip Emitter Flow Rate for Your Soil.
Step 5: Flush the Tubing Before Closing the Ends
During installation, small pieces of plastic, soil, and other debris can enter the tubing.
Before completing the emitter system, flush the distribution lines according to the manufacturer’s instructions so debris can exit through the open ends.
Then install appropriate flush-end fittings or removable end caps.
Flush ends should remain accessible for future cleaning.
Skipping this step can leave debris inside the system, increasing the chance of clogged emitters immediately after installation.
Step 6: Run the System and Check Every Connection
Turn on the irrigation zone and observe the entire system while it operates.
Check tubing connections, fittings, emitters, and line ends for leaks.
Make sure water is reaching each intended planting area.
If the first emitters operate normally but those near the end of a long run deliver little water, the system may have a pressure or flow problem.
Possible causes include excessive tubing length, undersized distribution lines, too many emitters, a restriction, or a regulator that does not match the operating conditions.
For a closer look at these problems, see Why Is My Drip Irrigation Losing Pressure at the End?.
Step 7: Check How Water Moves Through the Soil
A drip emitter can appear to be working correctly while delivering water to the wrong location.
After the system has operated, inspect the soil around several representative plants.
Look for moisture reaching the intended root area without excessive surface pooling or runoff.
On sloped ground, check whether water is moving downhill before it has time to soak in.
Adjust emitter locations, irrigation duration, or the zone design when necessary.
Only after the system passes these checks should tubing be covered with the appropriate mulch or other approved material.
How Do You Choose the Right Emitters and Placement?
Drip emitters are not all designed to deliver water in the same way. Some release a fixed amount under specified operating conditions, while pressure-compensating models are designed to maintain more consistent output across a defined pressure range.
Pressure-compensating emitters may be helpful where tubing runs are long or elevation changes affect pressure. However, they cannot correct every problem caused by inadequate supply flow or poor system design.
The right emitter also depends on the soil.
In sandy soil, water may move downward relatively quickly, creating a narrower wetting pattern. In clay-heavy soil, moisture often spreads outward more slowly, and excessive application can lead to pooling or runoff.
For this reason, there is no universal emitter spacing or flow rate that works for every Albuquerque xeriscape.
The correct arrangement should be based on the plant’s water requirements, soil infiltration, operating pressure, and the manufacturer’s specifications.
An Example of Two Different Albuquerque Planting Beds
Imagine a home with two xeriscape planting areas.
The first is a west-facing shrub bed beside a driveway. It receives strong afternoon sunlight and reflected heat. The second is a partially shaded planting area near the house.
Both areas contain drought-tolerant plants, but their watering needs may differ because of exposure, soil conditions, plant maturity, and evaporation.
A practical design would evaluate whether they should operate on separate irrigation zones. It would also consider whether the emitters need different placement or output.
If the sunny bed contains new shrubs while the shaded bed contains established plants, separate watering schedules may be particularly useful.
This example illustrates why drip irrigation should be designed around actual planting conditions rather than installed as one continuous line with identical emitters everywhere.
Set the First Watering Schedule and Adjust It
After installation, the irrigation controller needs a starting schedule.
Newly planted xeriscape plants generally require more frequent attention during establishment than they will after developing a larger root system.
The correct watering duration depends on the soil, plant species, season, emitter output, and how deeply moisture reaches the roots.
Rather than relying on an arbitrary number of minutes, begin with plant-specific guidance and observe the results.
New Mexico State University’s Cooperative Extension publications provide regional horticulture and irrigation information that can help homeowners understand plant establishment and watering needs.
The EPA WaterSense watering guidance also explains the importance of matching irrigation to landscape conditions and avoiding unnecessary watering.
Check Soil Moisture Instead of Trusting the Timer Alone
A controller can run exactly as programmed while plants still receive too much or too little water.
Use a soil probe or carefully inspect soil near representative plants to determine whether irrigation reaches the intended root area.
If water pools on the surface, consider whether the soil is absorbing water slowly or whether the application rate is too high.
In some situations, dividing irrigation into shorter watering cycles with soak time between them can reduce runoff.
If the soil remains wet long after irrigation, the system may be applying more water than the plants need.
Seasonal adjustments are important in Albuquerque, where summer heat, spring winds, monsoon rainfall, and winter conditions can change watering needs substantially.
For additional ways to evaluate performance, see How Do I Know If My Irrigation System Is Working Efficiently?.
Common Drip Irrigation Installation Problems
Even a carefully installed system may need adjustments after its first few watering cycles.
The most useful troubleshooting approach is to identify where the problem occurs before replacing components.
| Problem | Possible cause | First thing to check |
| Emitters near the end deliver little water | Excessive pressure loss, long tubing run, or inadequate supply | Check for restrictions, leaks, and proper system sizing |
| Water pools around plants | Slow soil infiltration or excessive application | Observe soil wetting and review emitter output |
| One emitter stops working | Sediment or a clogged emitter | Inspect the emitter and filter according to product instructions |
| Water sprays from a tubing connection | Loose fitting, damaged tubing, or excessive pressure | Shut off the zone and inspect the connection |
| One plant stays dry | Poor emitter placement or blocked flow | Check emitter operation and moisture near the root zone |
| Water use increases unexpectedly | Hidden leak or incorrect watering schedule | Inspect exposed fittings, tubing, and controller settings |
A damaged line beneath gravel can release water without producing an obvious puddle. Unusually wet soil, unexpected plant growth, or a change in system performance may indicate a problem.
Homeowners investigating these symptoms can read How to Find and Fix Hidden Drip Irrigation Line Leaks.
Can an Existing Sprinkler Zone Be Converted to Drip Irrigation?
Sometimes, but the conversion requires more than removing sprinkler heads and attaching drip tubing.
Sprinkler and drip systems often operate at different pressures and flow rates. Existing valves, filtration, pressure regulation, and control settings may need modification.
The condition of the existing system and its backflow protection also matter.
For a detailed explanation, see Can You Convert an Existing Sprinkler Zone to Drip Irrigation?.
Maintain the System and Prepare for Albuquerque Winters
Drip irrigation requires periodic inspection, even when the landscape contains drought-tolerant plants.
Filters can accumulate debris. Emitters may clog. Tubing can be damaged by gardening tools, animals, ultraviolet exposure, or shifting landscape materials.
Inspect the system periodically while it operates, particularly at the beginning of the irrigation season and after landscape work.
Check that water is reaching plants as intended and that exposed fittings remain secure.
Winter Preparation Matters in Central New Mexico
Albuquerque can experience freezing temperatures that damage irrigation components when water remains trapped in vulnerable lines, valves, filters, or regulators.
The appropriate winterization procedure depends on the system’s design and manufacturer instructions.
Some systems require draining or professional winterization. Compressed-air procedures, where appropriate, require suitable equipment and careful pressure control to avoid damage or injury.
Homeowners can learn more from How to Winterize Your Albuquerque Drip Irrigation System.
Frequently Asked Questions About Xeriscape Drip Irrigation
Do Xeriscape Plants Need Drip Irrigation?
Not every established xeriscape plant requires permanent supplemental irrigation. However, newly installed plants generally need establishment watering, and some drought-tolerant species benefit from occasional irrigation during extended dry conditions.
Drip irrigation provides a controlled way to deliver that water.
Can Drip Irrigation Tubing Be Installed Under Gravel?
Yes, suitable drip tubing can often be installed beneath decorative gravel or mulch when the product is approved for that application.
Avoid burying components that require routine maintenance, and protect tubing from damage. Follow manufacturer guidance for installation depth and material coverage.
How Deep Should Drip Irrigation Tubing Be Buried?
There is no single burial depth appropriate for every system.
Depth depends on the tubing type, manufacturer instructions, soil conditions, landscape use, and exposure to damage. Some systems are installed near the surface beneath mulch, while products specifically designed for subsurface irrigation may be installed differently.
Can Plants with Different Watering Needs Share One Drip Zone?
They can sometimes share a zone when emitter output and placement can accommodate their differences. However, plants requiring substantially different watering frequencies are generally easier to manage on separate zones.
A new tree and an established low-water shrub, for example, may need different establishment and maintenance schedules.
How Can You Tell Whether Drip Emitters Are Clogged?
A clogged emitter may release little or no water even when nearby emitters operate normally.
Check the emitter’s output, inspect the filter, and confirm that moisture reaches the intended root zone. Clean or replace components according to the manufacturer’s instructions.
When Should You Hire a Professional to Install Drip Irrigation?
Installing drip irrigation in a small, accessible planting bed may be manageable for a homeowner familiar with basic irrigation components.
Larger or more complicated projects benefit from professional design and installation, particularly when they involve multiple irrigation zones, significant elevation changes, difficult soil conditions, or modifications to existing sprinkler systems.
Professional assistance is also appropriate when the project requires changes to underground water-supply piping, backflow protection, or irrigation valves.
The goal is not simply to connect tubing and make water flow. A properly planned system must deliver adequate moisture to the plants without creating pressure problems, unnecessary runoff, or difficult maintenance conditions.
Get Help Installing Drip Irrigation in Your Albuquerque Xeriscape
A successful drip irrigation installation begins with the plants and the property. Once watering needs, soil conditions, and available pressure are understood, the tubing, emitters, and controls can be selected to work together.
Taking time to flush the lines, check for leaks, observe soil moisture, and adjust the watering schedule can prevent many common irrigation problems.
R & S Landscaping provides xeriscaping, landscape design, and irrigation services throughout Albuquerque, Rio Rancho, Corrales, and surrounding Central New Mexico communities.
Whether you’re installing drip irrigation in a new xeriscape or upgrading an existing landscape, professional guidance can help you choose a system suited to your property.
Call R & S Landscaping at 505-271-8419 or visit rslandscapinginc.com to discuss your drip irrigation project.