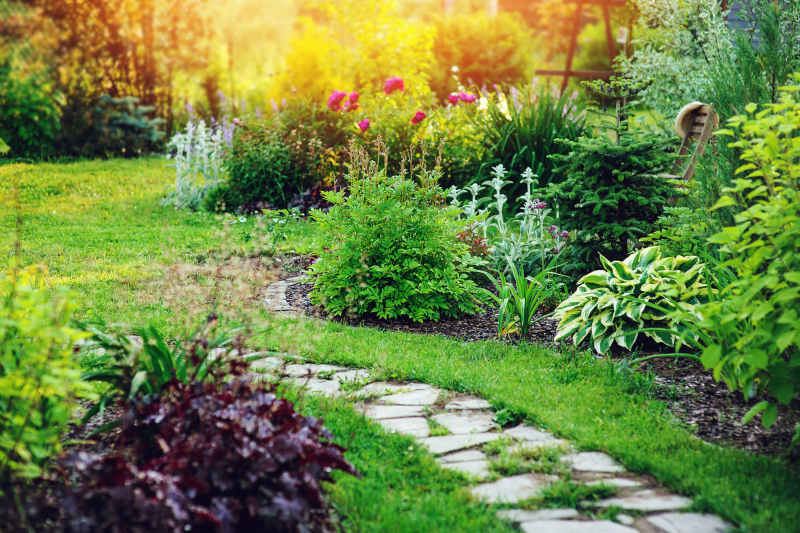
The Ultimate Guide to Planting Perennials

If you give your perennials a good start, they will repay you with many colorful seasons. You’ll enjoy a display of blooms, textured leaves, and eye-catching seedheads if you concentrate on perennials as the main structural element of your garden. There are many different types of perennials, from when they bloom to how much sunshine they like. All of them, nonetheless, have the trait that proper planting promotes optimal growth. Perfecting your planting method provides a solid foundation for your perennials, which is essential for all subsequent growth.
Perennials may theoretically be planted whenever your soil is workable. In practical terms, spring or autumn are the optimum seasons to grow perennials. Prior to the arrival of the hot, dry summer weather, these seasons enable plants to establish themselves and develop new roots. It is OK to plant in the summer, but you will need to water often. You may work with the cycles of nature to provide plants with optimal growth circumstances by planting in the spring or autumn. These ten easy actions can help you plant successfully.
Buy the Plants
Compile the list of perennials you intend to plant. To facilitate the process of establishing a new bed, attempt to assemble as many of the plants as you can. One year after planting, smaller perennials in 4-inch pots catch up to bigger ones in terms of cost. Fall is the ideal season to purchase perennials since garden centers are seeking to clear out their stock before the winter months. This time of year is when BOGO sales are most common.
Get Soil Ready
As much organic matter as possible should be added to the planting area. Use materials such as bark fines, composted manure, old leaves, mushroom compost, and shredded bark mulch. Perennials spend several years in one location. A base that promotes plant growth is created by adding a lot of organic materials. Before planting, work on this project for a few days, weeks, months, or even a whole season. Many gardeners prepare their soil in the autumn and then plant in the spring. Prepare soil in the summer for autumn planting if you can tolerate the heat.
Test Your Layout
Before planting, place the plants in the beds if you’re planting them. To allow for any necessary design adjustments, try to do this a few days before planting. This allows you to see the garden design from all angles and at various times of the day, both indoors and outside. While pots are out in the bed, be sure to water the plants.
Water the Plants
Before you dig a single planting hole, give your perennials good irrigation. It is important for you to provide sufficient water, so that all plants grow healthily.
Dig the Hole to Plant
Create a planting hole that is twice as broad and slightly deeper than the container the plant is in. Place one or two handfuls of organic materials into the opening. Before planting, moisten the hole if the soil in the bed is dry. Dig planting holes one at a time when planting a big bed to avoid the soil inside drying up once it’s surfaced.
Tease the Roots
Take the plant out of its container. Tease and break up the base of the root ball if the roots are thick and strongly shaped like a pot. This promotes the formation of new roots. Fill the planting hole with dirt and broken roots to provide organic materials.
Check the Depth
Place the plant in the opening. Make sure it faces the direction you want it to (many plants, particularly those in crowded displays, have a better side). Verify the depth of planting. Make sure the plant is positioned in the hole at the same depth as it was in the container. Don’t bury the crown, which is the junction of the stems and roots. Laying a stick or other instrument across the planting hole from the surrounding soil to the perennial root ball is a simple method of testing planting depth. An even tool is a successful tool.
Fill the Hole
Incorporate compost or other organic stuff into the dirt you removed from the hole. If desired, add a little amount of granular organic fertilizer with low nitrogen content. Combine everything into a salad-like mixture and start filling the hole. Water helps to settle the dirt after the hole is partly filled. Once the hole is fully filled, gently compact the earth around the plant. For this activity, use your hands rather than your feet.
Add Water
Water the perennial that was just planted. Make sure the soil is well soaked so that the water reaches the root ball.
Mulch
Apply a 2- to 3-inch layer of mulch to the soil. Organic mulches, such as compost or triple-ground shredded hardwood bark mulch, are ideal for perennial plants. With time, this kind of mulch decomposes and enriches the soil. Refrain from covering the crown or packing mulch up against perennial plant stems as this can cause decay. Retain mulch away from perennial stems so that the plant in the hole produces a donut shape.
Watch them Grow
When you take the time to thoroughly prepare the soil and plant, perennials establish themselves well and flourish swiftly. Careful preparation of the soil and proper planting methods lead to a quick rise in size. Perennials are sure to flourish with these two powerful combinations.
